

Step-by-Step Guide to Setting Up a Merchant Account
Step-by-Step Guide to Setting Up a Merchant Account
In the modern business world, accepting payments from customers is no longer a simple transaction. Today, businesses need a secure and efficient system to process electronic payments, whether from credit cards, debit cards, or mobile wallets. This is where a merchant account comes into play. Setting up a merchant account is essential for businesses that want to thrive in an increasingly digital economy. This comprehensive guide will provide you with the tools you need to set up your merchant account successfully.
Whether you’re a startup or an established business, understanding how to choose and set up your merchant account is crucial. We’ll take you through the entire process, from choosing a payment processor to integrating payment gateways and testing your setup.
What is a Merchant Account?
A merchants credit guide account is a type of business bank account that allows businesses to accept payments in various forms, primarily through credit or debit cards. When a customer makes a purchase, the funds are temporarily held in the merchant account before being transferred to your business’s regular checking account. This process enables the efficient flow of money, both online and offline.
Unlike a standard business account, a merchants credit guide is linked to a payment processor. The processor securely verifies each transaction and ensures the smooth transfer of funds, acting as the intermediary between your customers’ banks and your business’s bank.
Why Do You Need a Merchant Account?
Many business owners question whether they need a merchant account, especially if their business is small or just starting out. The short answer is yes. In today’s digital age, offering electronic payment options is essential for customer satisfaction and business growth. Here’s why:
- Security: Merchant accounts provide security features such as encryption and fraud detection, ensuring that your customers’ payment information remains protected.
- Customer Convenience: Many consumers prefer to pay using their cards rather than carrying cash. Offering card payment options can increase sales and improve customer loyalty.
- Professionalism: Accepting credit card payments adds a level of professionalism to your business, helping to build trust with customers.
- Growth Potential: As your business grows, so will your need for seamless payment solutions. A merchant account can scale with you, enabling your business to accept payments both online and in person.
A reliable merchant account ensures that you’re ready to handle payments across different platforms, providing customers with the best possible purchasing experience.
Read also:- Select a Merchant Credit Guide for Your Business: A Comprehensive Guide
Types of Merchant Accounts
There are different types of merchant accounts designed to cater to the specific needs of various businesses. Understanding these options can help you make the right choice:
| Type of Merchant Account | Best For | Description |
|---|---|---|
| Standard Merchant Account | Small businesses or retail stores | Fixed fees for each transaction, minimal fees. Ideal for low-volume businesses. |
| High-Risk Merchant Account | Businesses in high-risk industries (e.g., gambling, adult services, travel) | Offers additional protection and services to minimize chargebacks and fraud. |
| Integrated Merchant Account | E-commerce businesses or businesses with advanced POS needs | Provides a seamless payment integration with e-commerce platforms or POS systems. |
| Multi-Merchant Account | Businesses managing multiple stores or subsidiaries | Allows you to manage all transactions under one account for multiple entities. |
Choosing the right type of merchant account is crucial to minimizing transaction fees and managing payment processing efficiently.
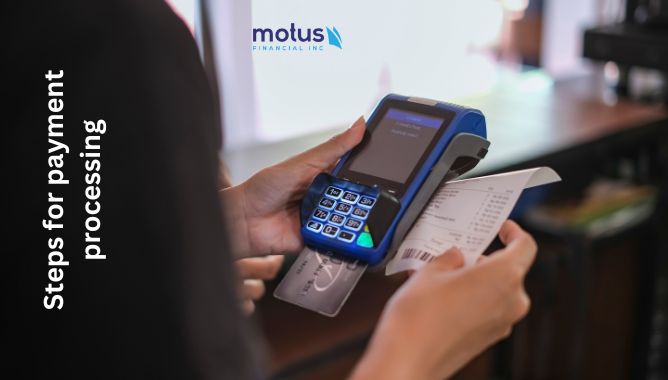
Step 1: Choose a Payment Processor
Choosing the right payment processor is one of the most important steps in setting up a merchant account. A payment processor is the company that facilitates the authorization of payments between your business and your customers’ banks. The processor ensures that funds are transferred from the customer’s account to your merchant account securely.
There are several factors to consider when choosing a payment processor:
- Reputation: Research the payment processor’s reputation by reading reviews and speaking with other business owners who use the service. Look for processors with excellent customer support and a track record of reliability.
- Transaction Fees: Payment processors charge fees for their services. Compare different providers to find one that offers competitive rates. Some charge a flat fee per transaction, while others charge a percentage.
- Payment Methods: Ensure the processor supports a wide range of payment options, including major credit cards, debit cards, and mobile payment systems like Google Pay and Apple Pay.
- Integration Options: Check whether the processor integrates easily with your existing POS or e-commerce system. Some processors offer ready-to-use plugins for popular platforms like Shopify and WooCommerce.
Your merchant account provider and payment processor will be your key partners in managing customer transactions, so it’s essential to choose a provider that meets your business’s needs.
Step 2: Gather Your Business Documentation
Once you’ve chosen your payment processor, the next step in the merchant credit Card guide is to gather the necessary documentation for applying for your merchant account. Each payment processor has its requirements, but common documents you will need include:
- Business License: A valid license to operate your business.
- Tax Identification Number (TIN): An EIN or SSN that identifies your business to the IRS.
- Bank Account Details: Your business’s bank account information where payments will be deposited.
- Business Financials: Your company’s revenue estimates and monthly sales projections to help the payment processor assess your risk profile.
- Owner Details: Personal identification details of the business owners, including proof of identity.
Being prepared with all required documents can expedite the approval process, allowing you to begin accepting payments faster.
Step 3: Apply for the Merchant Account
With your documentation ready, it’s time to fill out the merchant account application form. This step involves providing your business information, financial details, and personal information. Therefore, Most payment processors offer an online application process that is easy to complete.
The merchant credit guide advises businesses to be transparent and accurate when completing the application. If you provide incorrect or incomplete information, the processor may delay or deny your application. Typical details requested on the application include:
- Business Name and Address: Legal name and location of your business.
- Bank Account Info: Your business’s bank account where funds will be deposited.
- Transaction Volume: How much you expect to process monthly, including both average ticket size and frequency of transactions.
- Ownership Information: Name and details of the business owner(s).
Once you submit the application, the payment processor will review your business and may request additional documentation. This is a standard procedure to verify your legitimacy and assess the risk associated with your business.
Step 4: Wait for Approval
The approval process for a merchant account typically takes a few days to a couple of weeks, depending on the payment processor. During this time, the processor will evaluate your application and decide whether to approve or decline your request.
Some processors may approve your merchant account instantly, while others may require more detailed documentation or a conversation to discuss the specifics of your business. So, It’s important to be patient during this period, as the processor is assessing your business’s ability to manage chargebacks and fraud risks.
Step 5: Set Up Payment Gateway Integration
After approval, you’ll need to set up a payment gateway to enable online transactions. A payment gateway is the technology that connects your website or POS system with the merchant account to process payments securely. The payment gateway allows your customers to make payments directly through your website.
For online businesses, integrating a payment gateway is crucial. It allows customers to purchase products or services from your website, enter their payment information, and complete the transaction in real time.
For brick-and-mortar stores, a POS system connected to your merchant account will allow you to process in-person payments using debit or credit cards.
Step 6: Configure Your Merchant Account Settings
Once your payment gateway is set up, you can configure the settings for your merchants credit guide account. These settings will help customize your payment processing and ensure the security of each transaction.
Here are some settings to consider:
- Transaction Limits: Set transaction limits to help manage cash flow and reduce the risk of fraud.
- Fraud Protection: Enable security features such as card verification and address verification systems (AVS) to prevent fraudulent transactions.
- Currency Preferences: Select the currencies your business will accept, especially if you plan to expand internationally.
- Refund and Chargeback Policies: Define how refunds and chargebacks will be handled to avoid financial loss.
These configurations will streamline your payment processes and provide added security for both you and your customers.
Step 7: Test the Payment System
Before officially launching, it’s essential to test the entire payment system. This includes testing the payment gateway, the merchant account’s functionality, and ensuring that the transactions are securely processed.
- Test Transactions: Run a few test transactions to verify that payments are being processed smoothly. So, This also ensures that you receive payments into your merchant account.
- Security Check: Make sure the system complies with PCI DSS (Payment Card Industry Data Security Standards) to protect customer data.
- Customer Experience: Test the checkout process from the customer’s perspective to ensure it’s user-friendly and free of errors.
Testing ensures that any issues can be resolved before you start accepting payments from actual customers.
Step 8: Start Accepting Payments
After completing all the necessary steps and tests, you’re ready to start accepting payments. At this point, your merchant account should be fully functional, and your payment system is set up to process customer transactions smoothly.
Make sure to keep track of your transaction reports, monitor any chargebacks, and review your account’s performance regularly. Monitoring will help you identify any discrepancies and ensure your business remains financially healthy.
Read also: Common Issues with Merchant Credit Card Services and How to Fix Them
Contact Us
At Motus Financial, we specialize in helping businesses like yours set up secure and efficient merchant accounts. If you need assistance or have questions about the process, feel free to reach out. Our team of experts is here to guide you every step of the way.
Contact us today to get started or schedule a free consultation!
By following the steps outlined in this merchants credit guide, you can easily set up your merchant account and begin accepting payments with confidence. So, Whether you’re a small business owner or managing a larger enterprise, having a merchant account is crucial for ensuring smooth and secure payment processing. Take the time to choose the right payment processor and configure your account settings carefully to set your business up for long-term success.


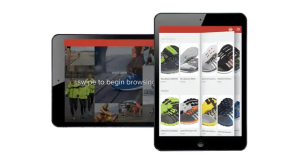
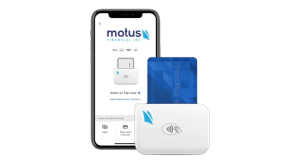
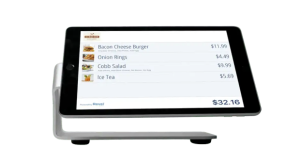 Our POS systems are designed to streamline in-store transactions. With features like inventory management, sales reporting, and customer tracking, our POS solutions help you run your business more efficiently. Our terminals are compatible with various payment methods, including chip cards, contactless payments, and mobile wallets.
